Table of Contents
ToggleWhen your Whirlpool refrigerator ice maker quits producing cubes, or starts churning out misshapen chunks of ice that jam the dispenser, you don’t need to replace the entire fridge or schedule a pricey service call. Most ice maker replacements are straightforward DIY projects that take about 30 minutes and require only basic hand tools. The parts run between $50 and $150 depending on your model, and the job doesn’t involve any plumbing beyond reconnecting a single water line. This guide walks through the diagnostic signs, part selection, and installation steps so homeowners can tackle this common appliance repair with confidence.
Key Takeaways
- Whirlpool refrigerator ice maker replacement is a 30-minute DIY project costing $50–$150, saving homeowners from expensive service calls.
- Watch for five warning signs—no ice production, undersized cubes, jamming, leaks, and grinding noises—that indicate your ice maker needs replacement.
- Always locate your exact Whirlpool model number and verify OEM part compatibility before purchasing; generic universal ice makers often require modifications.
- The replacement process requires only basic tools (screwdriver, pliers, wrench) and involves disconnecting the water line, removing mounting screws, and reseating the new assembly—no advanced plumbing skills needed.
- After installation, discard the first two batches of ice, confirm the water supply line is fully connected, and maintain your filter every six months to prevent future ice maker failures.
Signs Your Whirlpool Ice Maker Needs Replacement
Ice makers don’t usually fail without warning. Watch for these telltale symptoms that indicate it’s time for a replacement rather than a simple fix:
No ice production for 24+ hours after confirming the water supply is on and the shut-off arm isn’t raised. If the unit isn’t cycling at all, no sound, no movement, the motor or module has likely failed.
Undersized or hollow ice cubes suggest the fill valve or timing mechanism is malfunctioning. You might get a tray of ice, but the cubes are small, hollow, or irregularly shaped because the water fill cycle is cut short.
Constant jamming or clumping happens when the ejector blades or harvest mechanism wears out. Ice freezes into a solid mass instead of individual cubes, blocking the bin and dispenser.
Leaking water inside the freezer around the ice maker assembly. This often points to cracked housing or a failed water inlet valve within the unit itself. Pooling water can freeze into sheets on the freezer floor.
Loud grinding or clicking noises during the harvest cycle without actually releasing ice. The motor is running, but the gears or ejector mechanism is stripped or jammed.
Before pulling the trigger on a replacement, confirm the water supply line to the fridge is open, the filter isn’t clogged (most Whirlpool models require filter changes every six months), and the freezer temperature is between 0°F and 5°F. If those check out and symptoms persist, replacement is the most cost-effective solution. According to appliance repair guides, ice maker failures account for nearly 20% of all refrigerator service calls, but the vast majority don’t require professional intervention.
Finding the Right Replacement Ice Maker for Your Whirlpool Model
Whirlpool manufactures dozens of refrigerator models, and ice makers aren’t universally interchangeable. Installing the wrong unit leads to poor fit, water leaks, or a non-functional assembly.
Locate your model number on the sticker inside the fridge compartment, usually on the left or right sidewall near the top. It’s a long alphanumeric code (e.g., WRS325SDHZ04). Write it down or snap a photo.
Cross-reference the OEM part number for your ice maker. Whirlpool’s official parts website lets you input the model number and browse diagrams. Common replacement part numbers include W10873791, W10469286, and 4317943, but always verify compatibility. Generic “universal” ice makers exist, but they often require modifications or adapters, stick with OEM or manufacturer-approved aftermarket parts for a plug-and-play install.
Check if your model uses modular or in-door ice makers. This guide covers traditional in-freezer modular units (the rectangular assembly mounted to the freezer wall). In-door ice makers and dual-system models require different procedures and aren’t DIY-friendly without appliance-specific training.
Purchase whirlpool refrigerator ice maker parts from authorized dealers, appliance parts suppliers, or directly from Whirlpool. Prices typically range from $60 to $140. Buying from reputable sources ensures you receive genuine parts with warranty coverage. Counterfeit or refurbished units can fail prematurely or void your refrigerator’s warranty.
Verify what’s included in the replacement kit. Most OEM kits include the ice maker assembly, mounting bracket, wire harness, and a small bag of hardware (screws and wire nuts). The water supply line and shut-off valve are usually not included, you’ll reuse your existing line.
Tools and Materials You’ll Need
This is a light-duty repair. Gather everything before you start so you’re not hunting for a screwdriver with the freezer door open.
Tools:
- 1/4″ nut driver or Phillips screwdriver (depends on your model’s mounting screws)
- Needle-nose pliers for disconnecting wire harnesses and the water line
- Adjustable wrench (if your water line uses compression fittings)
- Flashlight or headlamp to see inside the cramped freezer compartment
- Towel and small bucket to catch residual water in the line
Materials:
- Replacement ice maker assembly (OEM or verified compatible part)
- Teflon tape (if you’re reseating any compression fittings)
- Wire nuts (usually included with the new unit, but keep spares handy)
Safety Note: Unplug the refrigerator or switch off the breaker before starting. Even though the voltage is low, you’re working with electrical connections and water, better safe than sorry. Keep a towel on the floor: a small amount of water will drip from the supply line when you disconnect it.
Step-by-Step Ice Maker Replacement Process
Removing the Old Ice Maker
-
Unplug the refrigerator or flip the dedicated breaker. Confirm power is off by checking that interior lights don’t turn on when you open the door.
-
Empty the ice bin and remove it from the freezer. Set it aside in the sink.
-
Locate the ice maker’s wire harness. It’s a small plastic plug connecting the unit to the freezer wall, usually tucked behind or beside the assembly. Press the release tab and pull the connector apart. Don’t yank on the wires, grip the plastic housing.
-
Disconnect the water supply line. Most Whirlpool models use a quick-connect fitting, press the collar and pull the tubing free. Older models may have a compression nut that requires an adjustable wrench. Have a towel ready: a tablespoon or two of water will dribble out.
-
Remove the mounting screws. Typically two Phillips-head screws at the top of the unit secure it to a metal bracket on the freezer wall. Support the ice maker with one hand as you back out the last screw so it doesn’t drop.
-
Lift the assembly off the mounting bracket and pull it out of the freezer. Inspect the bracket, if it’s damaged or corroded, replace it (it’s usually included with OEM kits or available separately for under $10).
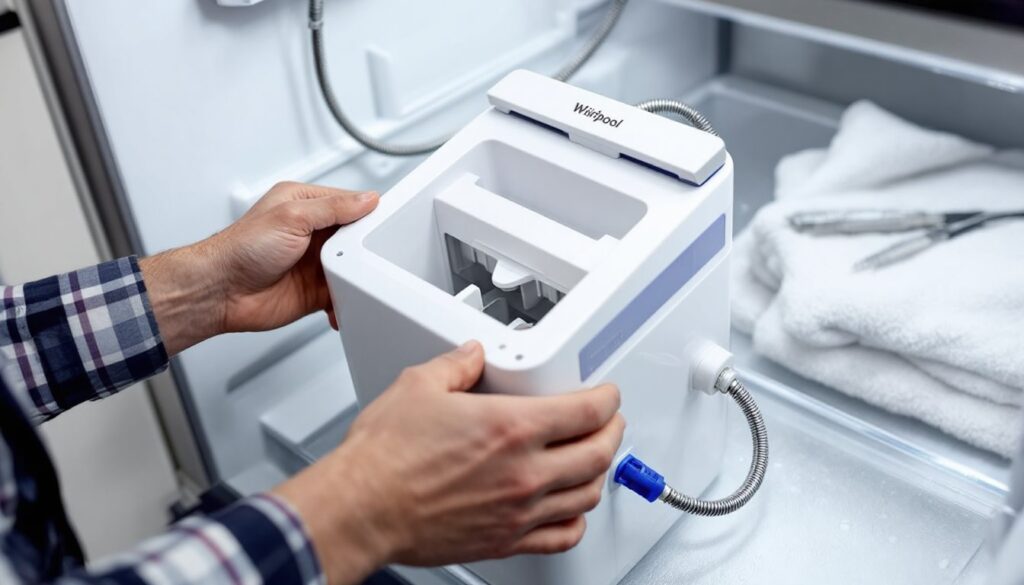
Installing Your New Ice Maker
-
Position the new mounting bracket (if included) on the freezer wall, aligning the screw holes with the existing holes. If reusing the old bracket, make sure it’s clean and free of ice buildup.
-
Slide the new ice maker onto the bracket. The back of the unit has slots or tabs that hook over the bracket’s prongs. Push it flush against the wall.
-
Secure it with the mounting screws. Tighten them snug, but don’t over-torque, plastic threading can strip. The unit should sit level: use a small torpedo level if you’re particular, but it’s not critical.
-
Reconnect the water supply line. Push the tubing into the inlet fitting until you hear or feel a click (quick-connect), or hand-tighten the compression nut and give it a quarter-turn with a wrench. Don’t reef on it, compression fittings seal with moderate pressure.
-
Plug in the wire harness. Line up the connector and press until it locks. You should hear a click. Tug gently to confirm it’s seated.
-
Restore power to the refrigerator. You’ll hear the ice maker hum or click as it initializes. Some models run a brief self-test cycle.
-
Lower the shut-off arm (if your model uses one) or ensure the on/off switch is in the “on” position. The first batch of ice usually takes 6 to 12 hours. For detailed project planning and appliance installation tips, many homeowners find online cost and time estimators helpful before starting DIY repairs.
-
Discard the first two batches of ice. New units can shed small plastic particles or carry manufacturing residue. Toss the first couple of trays to be safe.
Troubleshooting Common Installation Issues
Even straightforward installs hit snags. Here’s how to address the most common post-replacement problems:
Ice maker cycles but produces no ice: Double-check that the water supply line is fully seated and the shut-off valve (usually located behind the fridge or under the sink) is open. If water isn’t reaching the unit, you’ll hear the motor run, but no ice will form. Also confirm the freezer temperature is below 10°F, warmer temps prevent proper freezing.
Water leaks inside the freezer: Inspect the water line connection at the back of the ice maker. A loose quick-connect or under-tightened compression fitting is the usual culprit. Remove and reseat the line, ensuring it clicks or is snug. If the leak persists, the fill valve or tubing inside the assembly may be defective, contact the supplier for a warranty replacement.
Ice maker doesn’t power on (no sounds, no lights): Verify the wire harness is fully connected and that you’ve restored power to the fridge. Test the outlet or breaker with a multimeter or plug in another appliance to confirm power. Some Whirlpool models have a dedicated ice maker switch on the control panel, make sure it’s enabled.
Cubes are small or incomplete: This usually points to low water pressure (below 20 psi) or a clogged water filter. Replace the filter if it’s more than six months old. If your home has low water pressure, you may need a booster pump, consult a plumber.
Grinding noise during harvest cycle: The ice tray or ejector blades might not be aligned correctly. Power off the unit, remove the ice maker, and reinstall it, double-checking that it’s seated flush on the bracket. If the noise continues, the new unit may be defective.
For ongoing maintenance schedules and seasonal appliance checks, setting reminders to replace water filters and inspect supply lines twice a year can prevent future failures. Most ice maker issues stem from neglected maintenance rather than faulty parts.
When to call a pro: If you’ve followed every step, the water supply and power are confirmed, and the unit still won’t cycle, you may have a control board issue in the refrigerator itself (not the ice maker). That’s beyond DIY scope and requires a licensed appliance technician with diagnostic tools. Also, if your fridge is still under warranty, DIY ice maker replacement might void coverage, check your paperwork first.