Table of Contents
ToggleA dripping shut off valve under the sink or behind the toilet is more than annoying, it’s wasting water, risking damage to cabinets or drywall, and signaling a failure that’ll only get worse. Most leaks stem from worn packing material, loose fittings, or corrosion inside the valve body. The good news? Many shut off valve leaks can be fixed in under an hour with basic tools and a few dollars in parts. This guide walks through diagnosing the leak source, choosing the right repair method, and knowing when it’s time to swap the valve entirely.
Key Takeaways
- A leaking water shut off valve often stems from worn packing material, loose fittings, or internal corrosion, and most repairs can be completed in under an hour with basic tools.
- Tightening the packing nut around the valve stem is the quickest fix for leaks around the handle, though persistent dripping may require replacing the packing material or valve seat washer.
- Different valve types—compression, ball, and gate valves—leak at different points; compression valves under sinks are easiest for DIY repair while ball or gate valves on main lines are better left to plumbers.
- Replacing the valve entirely is the best solution if the valve body is cracked or corroded, fails to close completely, or if replacement parts are unavailable or obsolete.
- Modern quarter-turn ball valves cost under $10 and are more reliable than older compression or gate valves, making them ideal upgrades during any replumbing project.
- Always shut off the upstream water supply, drain the line, and gather all tools and materials before starting a water shut off valve repair to minimize water waste and downtime.
Why Your Water Shut Off Valve Is Leaking
Shut off valves live hard lives. They sit idle for months or years, then get cranked open or closed in an emergency. That cycle of dormancy and sudden use is exactly what causes most failures.
Leaking when the valve is closed usually points to a worn valve seat or damaged internal washer. When you turn the handle to shut off the water, a compression mechanism pushes a washer against the valve seat to create a seal. Over time, mineral deposits pit the seat or the washer hardens and cracks. Water finds a path through the imperfect seal and drips from the outlet.
Leaking when the valve is open, or leaking from the packing nut around the stem, indicates degraded packing material. The packing is a ring of graphite-impregnated string or rubber that wraps around the valve stem where it exits the body. It keeps water from seeping up the stem threads. Years of heat cycling, chlorine exposure, and compression break down the packing, and water starts weeping out around the handle.
Corrosion is another culprit, especially in older brass or galvanized valves. Pinholes or cracks in the valve body let water escape regardless of handle position. If you see green verdigris or rust stains on the body, the valve may be toast.
Finally, over-tightening during installation can warp the valve body or crack internal components. Always follow manufacturer torque specs and use two wrenches, one to hold the valve body, one to tighten the nut, to avoid twisting the pipe or valve.
Types of Water Shut Off Valves and Common Leak Points
Understanding which valve you have helps target the repair.
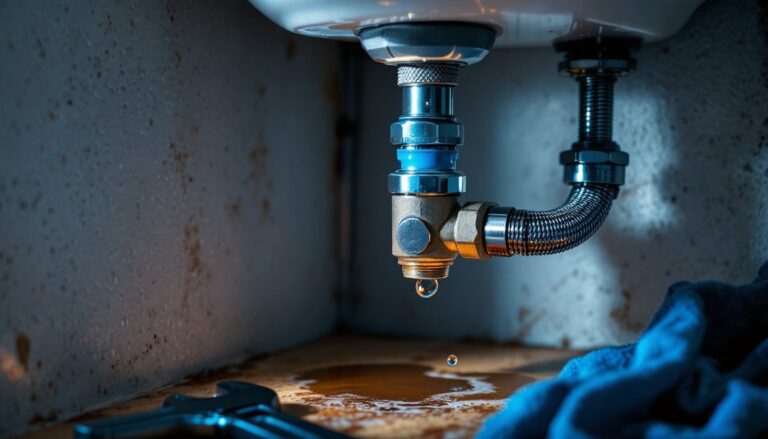
Compression valves are the traditional angle-stop or straight-stop valves under sinks and behind toilets. They use a threaded stem that compresses a rubber or fiber washer against a brass seat. Leak points: packing nut (around the stem) and the valve seat/washer interface.
Ball valves have a rotating perforated ball inside the body. A quarter turn of the lever opens or closes the port. They’re popular for main water shutoffs and outdoor hose bibs. Ball valves rarely leak from the ball itself: leaks usually occur at the packing gland around the stem or at threaded connections. They’re more reliable than compression valves but harder to rebuild, often you replace the whole unit.
Gate valves use a wedge-shaped gate that lowers into the flow path. Common on older main supply lines, they’re notorious for failing when partially open (the gate vibrates and erodes). Leak points: packing nut and bonnet threads. Gate valves are largely obsolete in new construction: replace with a ball valve if you’re repiping.
Quarter-turn ceramic-disk valves (used in some modern fixtures) have two ceramic disks that slide over each other to control flow. They’re durable but not typically field-repairable, if one leaks, replace it.
Most DIY repairs involve compression valves under fixtures, so that’s the focus here. If you have a leaking ball or gate valve on the main line, consider calling a plumber: shutting off municipal water and working on large-diameter pipe is a bigger job.
Tools and Materials You’ll Need for the Repair
Gather everything before you start. Mid-repair hardware-store runs waste time and leave water shut off longer than necessary.
Tools:
• Adjustable wrench (8-inch or 10-inch)
• Basin wrench (if the valve is in a tight spot under a sink)
• Slip-joint pliers
• Utility knife (to cut packing material)
• Flashlight (undercabinet work is always dim)
• Bucket and rags (to catch residual water)
• Thread-seal tape (PTFE tape, sometimes called Teflon tape)
• Small wire brush (to clean threads and valve seat)
Materials:
• Packing string (graphite-impregnated cord: sold by the foot at hardware stores)
• Replacement valve seat washer (bring the old one to match size and style)
• Valve packing washers (rubber O-rings or fiber washers, valve-specific)
• Penetrating oil (if the packing nut is seized)
• Replacement shut off valve (have one on hand in case the valve body is cracked)
Wear safety glasses: old fittings can spray water or break loose suddenly. Keep a headlamp or clip light handy for cramped undercabinet spaces.
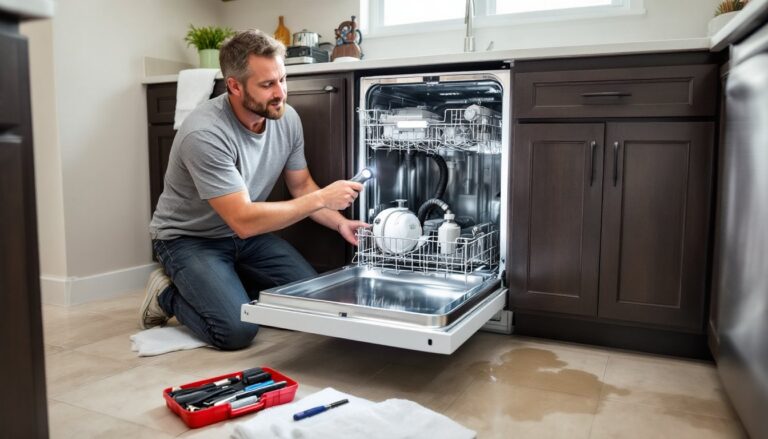
Step-by-Step Guide to Fixing a Leaking Shut Off Valve
Start by shutting off the water upstream of the leaking valve. For a sink or toilet shut off, that means the main house valve or the valve at the water meter. Open a faucet downstream to relieve pressure and drain the line. Place a bucket under the valve and have rags ready.
Tightening the Packing Nut
If water is weeping from around the valve stem (the shaft that turns), the packing nut may simply be loose. This is the hexagonal nut directly below the handle.
- Hold the valve body with one wrench to prevent twisting the supply pipe.
- Tighten the packing nut clockwise with a second wrench, snug it another quarter to half turn. Don’t crank it: over-tightening crushes the packing and makes the handle hard to turn.
- Turn the water back on and check for leaks. If the drip stops, you’re done. If it persists, the packing material is shot.
This quick fix resolves many stem leaks without disassembly, especially on valves that haven’t been serviced in years.
Replacing the Packing Material or Washer
If tightening doesn’t work, you’ll need to replace the packing or the valve seat washer.
To replace packing:
- Remove the handle. Most compression valves have a screw at the top of the handle: remove it and pull the handle off the stem.
- Unscrew the packing nut counterclockwise. Use penetrating oil if it’s corroded. Once loose, slide the nut up the stem.
- Inspect the old packing. You’ll see one or more rubber O-rings, a fiber washer, or wound graphite string. Remove it with a utility knife or pick.
- Wrap new packing string around the stem in the packing cavity. Wind it clockwise (same direction the nut tightens) in two or three tight loops. Trim any excess.
- Reassemble the packing nut and handle. Tighten the nut snugly, then back it off a quarter turn so the handle operates smoothly.
- Restore water and test.
To replace the valve seat washer (for leaks from the outlet when closed):
- Follow steps 1–2 above to remove the handle and packing nut.
- Unscrew the stem from the valve body by turning it counterclockwise. The entire stem assembly will come out.
- Inspect the washer at the bottom of the stem. It’s usually held by a brass screw. Remove the screw, pry off the old washer, and press on a new one that matches the diameter and thickness.
- Check the valve seat inside the body. Shine a flashlight into the opening: if you see deep pitting or corrosion, a new washer won’t seal. You can try smoothing the seat with a valve-seat dressing tool (a reamer available at plumbing-supply stores), but heavily damaged seats mean it’s time for a new valve.
- Reassemble the stem, packing, and handle. Apply a thin layer of plumber’s grease to the washer and threads for smoother operation.
- Turn on the water and cycle the valve a few times. The new washer may take a couple of cycles to seat fully.
If you’re working on a toilet supply line or faucet supply, many DIYers replace the washer and packing together to avoid a second repair six months later.
When to Replace the Valve Completely
Sometimes repair isn’t worth the effort. Replace the valve if:
• The valve body is cracked or corroded. No amount of new packing or washers will fix a pinhole in brass or a split chrome-plated body.
• The valve won’t close fully even after rebuilding. A damaged seat that can’t be dressed, or a warped stem, means the valve is done.
• You can’t find replacement parts. Oddball or obsolete valves, especially proprietary fixture shutoffs, may have no parts availability. Swapping the valve is faster.
• The valve is a gate valve. If you have an old gate valve on your main line or branch, upgrade to a ball valve. They’re more reliable, easier to operate, and last decades longer.
• You’re already replumbing. If you’re replacing supply lines or doing fixture work, throw in new quarter-turn ball valves. Modern ½-inch or ⅜-inch compression-inlet ball valves (often called angle stops) cost under ten dollars and install in minutes.
Replacing a compression shut off valve:
- Shut off the upstream water and drain the line.
- Disconnect the supply tube from the valve outlet (the top). Use an adjustable wrench on the compression nut: save the nut and ferrule if the tube is reusable.
- Unscrew the valve inlet from the stub-out pipe. Compression-fit valves have a nut and ferrule on the inlet: loosen the nut and pull the valve off. Sweat-soldered or threaded valves require a torch or pipe wrench, if you’re not comfortable with that, hire a plumber.
- Clean the stub-out threads or pipe end with a wire brush.
- Install the new valve. For compression-fit: slide the nut and ferrule onto the pipe, push the valve on, and tighten the nut. For threaded: wrap threads with thread-seal tape (three wraps clockwise) and hand-tighten, then snug with a wrench.
- Reconnect the supply tube. If the old ferrule is stuck on the tube, cut it off with a tubing cutter and use a new tube.
- Open the valve, restore water, and check for leaks at both the inlet and outlet.
Note: Any work involving soldered copper or supply-line replacement may require a permit in some jurisdictions, especially if it’s part of a larger remodel. Check your local code.